Monday 18 May 2015

MIT App Inventor - Reading and Writing a textfile

Textfiles

Getting information into and out of text files doesn't sound glamorous, but it's one of the most useful basic tools you can learn from any programming language. What I have here is a simple example that allows you to create and add to a text file called 'datastore.txt' and then read out information stored in that. Why might you want to do that? Well lets say you wanted to make a calendar program that notified you of particular events and/or times using notifications on your phone. A simple way of doing this would be to have all the information about alerts stored in a text file on your phone (you could event set up a button to download it from a website!), have your app read that information every day and figure out from it when to make alerts appear on your phone.
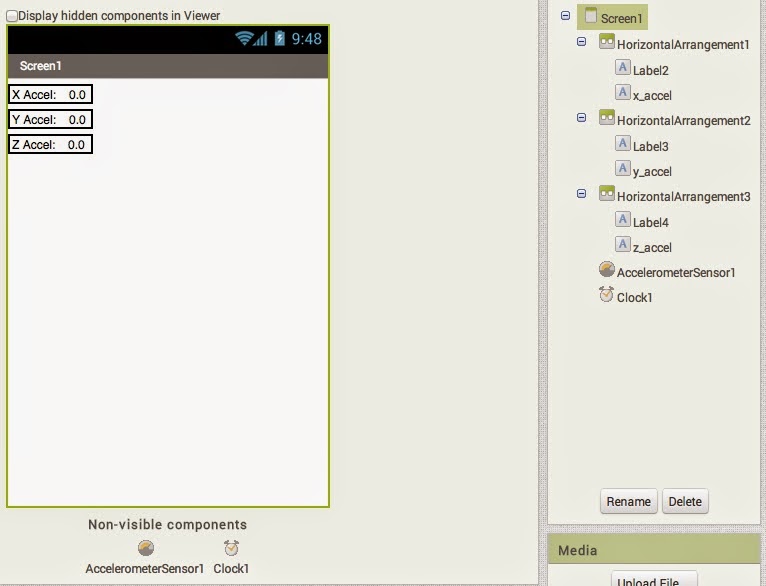
To get started you will need a 'File' element from the 'Storage' menu (but in the example above I've also included a textfield, label and a couple of buttons.)


In the code above we do 3 things:

  1. whenButton1.click - adds the text from the textbox to the file (append means 'add to the end of')
  2. whenButton2.click - reads all the information from the file
  3. gets the information read from the file and displays it on screen as the contents of the label field

Challenge:

Make a text file (either by making one and putting it on your android device or writing and app to make one) that contains a time (in seconds) followed by a comma followed by some text, like this:
     10000, "10 seconds have passed"
Then write a program to read this information, use the number to control the TimerInterval of a Timer element and the text to fill in the content of a notification box that appears after the TimerInterval has elapsed. (More info on the Notifier and Timer elements here). Good Luck!

MIT App Inventor - Notifications, Texting and Timer

Notifications

App inventor notifications are a simple way of displaying alerts for particular events on your phone. First off you will need a notifier element (from the user interface menu in designer). Then you will need to decide what is going to trigger the display if the alert. It could be receiving a text, being at a specific location, or (as in the greyed out code block on the right in the above image) it could be triggered by a change in the orientation of the phone. The Notifier element has a number of methods, but two particularly useful ones are ShowAlert and ShowMessageDialog, both of which have examples of use shown above. One is triggered by a timer element (explained in more detail below) and one by an orientation sensor. all the inputs to these methods allow you to control how the notification appears and exactly what it says. Have a crack at getting the OrientationSensor example working (you can find the Orientation sensor element under 'Sensors' in the Designer panel).

Texting

Texting from these apps is remarkably simple (fair warning though, you still incur text charges when you use this app to send a text as you would usually!). The Texting element can be found under 'Social' menu if the Designer panel. The example code in the image above shows how to make a button send a text by using the SendMessage method. Simple right? Well yes, however you need to set the message destination number and content before SendMessage will actually do anything. You can either do this manually in the Designer panel, or you can use other methods on the Texting element to set the message body and recipient number.

Timer

Most of the content above is concerned with setting up and managing the Timer element. Timer is part of the 'Clock' element under the 'Sensors' menu. In the image above the top left and right blocks to two things; allows you to set the time for a notification to occur (using a timepicker element) and then sets a default value for the time picker. So what exactly is going on?
The timer element works like and alarm clock, you give it a certain amount of time (usually in seconds) and, once the timer is Enabled and that period of time has elapsed, the timer element with generate a timer event. You can use this timed event to trigger other events using the 'whenClock1.Timer' element (as I do for displaying a notification above). You set the length of this time interval using 'TimeInterval', and it expects a value in seconds.

WARNING: The timer is super useful but can also get out of control easily. If you set your timer interval too low, then events (like notifications) will trigger multiple times each second and if you have too many your application will crash (as happened to me numerous times). My suggestion whilst you're learning about timer is to have the event you have triggered by it set TimerEnabled to False after it has completed (as I do above) to prevent the Timer triggering too many times!

Challenge: 

Make an app that notifies you 5 seconds after the orientation of your phone has changed.

Thursday 11 December 2014

MIT App Inventor - Accelerometer App

At 2014 CS4HS myself and several of the physics teachers decided grabbing the accelerometer data from a smartphone could be quite a good way of linking physics with digital technologies, but of course it's more fun to get the students to write it themselves than to get me to do it for them!

Regardless here's the rough outline for w MWE (minimum working example). You will need 6 label elements (one title and one reading for each direction), the accelerometer element and a clock element. I arranged mine using the horizontal arrangement sections like this:
Then all we need to do is connect the blocks in such a way that  the accelerometer data is printing to the screen with each 'tick' of the clock. Doing it this way prevents the phone trying to query the accelerometer sensor too quickly.

Challenge: Extend your app to store the accelerometer data using the TinyDB element to be printed out to the screen (or possibly to a file for plotting) at a later date

Friday 25 July 2014

Tkinter - Random Backgrounds with Python, version 2!

Our original random background generator was rife with errors so we've restructured it to make it a little better. See if you can follow the math and where I went wrong in the last one!

Tuesday 15 July 2014

Python - Level 3 Material

Level 3 Python Topics


Tkinter

Tkinter is a python module for creating simple graphical user interfaces (windows and elements). Whilst I covered the basics of making a Tkinter canvas and drawing shapes here, I'll also mention how to add buttons and text fields etc. Here's something we might start off with:

Now to add a button:
But this button doesn't do anything. To attach some functionality to it (in this case we're going to overwrite the blue rectangle with a white one) we use the 'command='statement in the Button() method and then we write a method linked to that (in our case called doClear).
But we can also add more than buttons - for instance here's a text_field with an associated label:
And here's a dropdown menu that allows users to pick from a series of predetermined choices:

Challenge: 

Make a Tkinter GUI that allows the user to pick from a list of countries and then draws out their flags using the Tkinter canvas create_rectangle/arc/oval commands when the 'Draw' button is pushed. I suggest starting with Japan, Germany, Norway and Scotland. 

Object Oriented Programming

Object orientation is a way of re-organising your code in such a way that it makes doing lots of complicated things much easier (a bit like we did with methods in the Level 2 section). The only way I managed to wrap my head around it (and it took me ages!) is to think of an illustrative example. Imagine you were writing a simple game like pong for instance.

Essentially you need to create two paddles and a ball (ignoring scoring), remember where each is, what direction it's travelling in and at what speed, where its edges are etc. You can do this pretty easily with only 3 items (although it will require a fair few variables). But imagine what would happen if you tried to extend pong in any way; What if you decided to add 2 balls? Or 3? What if you just wanted to add in a third dimension? The number of variables and complexity gets huge! And we're just doing more of the same, so instead we write a Class for the ball and paddles and then we just say how many of each we want. Each class remembers its own set of variables, which means we only have to define each one once and every new copy already has its own variables. For instance the Ball class might be defined like this:
The full code of a ball class might look like this: and now if we want to add bouncing functionality off the walls (and generally clean up the code)

Challenge: 

First, extend the code above to have >100 balls all starting at different locations (this should only take about 5 more lines of code). Make Pong using Tkinter and a class for the GUI, paddles and ball(s).

Final Challenge:

Build a 'mosaic maker' program - a program that generates a grid of squares in a GUI canvas and allows the user to change their colour by clicking on them (example shown below). The GUI should have 2 buttons that allow the user to select either red or blue for the colour of the clicked square (the default should be black) and one that allows the user to clear the grid to white. Finally you may want to extend your program to allow the user to replace a square with a .png image of their choice or to choose particular colours by entering their numeric RGB values, and write a doctest that tests your programs ability to deal with non-RGB inputs. Finally re-structure your program so that you have a class for the GUI.

Python - Level 2 material

Level 2 Python Topics


Methods

In the Level 1 material we used a number of 'methods' already (like rantint() and range()). These were predefined by other people - but we can just as easily write our own to do what ever we want, is particular this comes in really handy when you want to do the same or similar things multiple times. Rather than copy pasting our code - we can just repeat a method with different inputs. 


Challenge: 

Construct a method that picks a random number between 2 numbers passed to the method but that DOESN'T include the numbers themselves.

Importing Text files


Importing text files and processing them is how I actually got into python, it's certainly some of the simplest functionality that allows you to do a huge amount!
As with everything we can also wrap it into a neat little method to use again later:

Lets say you're interested in global companies performance - you can get data from Wikipedia about their financial performance and turn it into a csv or txt file using Google spreadsheets (tutorial here), but in this just download this data as a csv.  

Navigating Lists

Now we've converted our text file to a list we can now navigate it's rows and columns easily


Challenge: 

Using this table from Wikipedia (and a Python program), determine what's the most common starting letter for the name of one of Snow White's 7 dwarves (or just the most common name). 
(N.B. you can also use python to automatically get the data from the net for you using a module called urllib2 and the method urlopen(url) but it's far easier to start with a text file.)

Sanitising User input

Here's a few nice tricks for sanitising user input - can you figure out what each line does?

Challenge: 

Wrap the above code into a method that takes a text question and a list of acceptable responses and returns the user's answer when they give an appropriate one.

Final Challenge

Create a program that counts all the individual letters in a book and how many times each one occurs, then prints the results (I suggest a copy of Charles Dickens' 'A Tale of Two Cities' which you can get free here). Why? You might be able to use the frequency of certain letters as a sort of 'fingerprint' for the language of that book (i.e. is it in Modern English, Old English, German, French or Latin?), but also this 'frequency analysis' is the most basic method of code cracking. Lets say you receive some encoded text that has been encoded with a simple substitution cypher (i.e. one letter has just been replaced with another). A frequency analysis like this will show (roughly) which letters are which in the encoded message allowing you to start to decode it (for example in English the most common letter is 'e' so the most common character in the encrypted message is probably also 'e'). If you want to test your cracking skills find a nice long string and encode it with the command 'encode':
Then do a frequency analysis on the encoded string and see if you can figure out what character has been replaced with what (ideally you would have someone else encode the message so that you didn't know what the original message was!).

Python - Level 1 material

I've been running introductory Python sessions with students and teachers from around Wellington for the last few months looking at the material relevant to NCEA level 1, 2 and 3 digital technologies achievement standards. In the interests of discussion and improvement I'm going to post what I cover here along with the Challenges I pose to participants along the way to get people to use the knowledge I'm allegedly imparting to them over the course of the session. So without further ado here's Elf short, sweet foray into Level 1 Python (I'll cover level 2 and 3 in other posts). Feel free to copy and paste this code into ipython or a python script and run it as you go so you get a feel of what each block does.

Level 1 Python Topics


  • User information (input())
  • String editing and concatenation 
  • For Loops (for i in range():)
  • Counting (i+=1)
  • Random numbers and modules (import)
  • Conditional logic (if:)
  • While Loops (while True:)

User Information and string editing


Challenge: 

Ask the user for their name, address, phone number and the colour of their house. Then print out a description in the form of: "Your name is <name> and you live in a <colour> house at <address> and I can call you on <phone_number>".

For Loops


Challenge:

Using a for loop within a for loop print the numbers 0-10 3 times.

Counting/Iterating


Challenge:

Ask the user for a number then count down from that number.

Random and modules


Challenge:

Ask the user for a number and then print that many random numbers between 10 and 100. Hint: you will need to convert your user unput from a string to an integer using the int() command.

Conditional Statements


Challenge:

Pick a random number. If less than 10, or if equal to 30, or if it's not greater than 50 print 'Yes'.
Otherwise print 'No'.

While Loops


Challenge:

Set a while loop that picks and prints a random number that has a 1/100 chance of breaking from the loop.

Final Challenge:

I find the best way to learn these concepts is to have a challenge that uses them all. A nice simple example is creating a computer game of Rock, paper, scissors which you should be able to make using only the coding elements I've described above. You will need to ask the user for their choice of rock, paper or scissors (can you allow the user to ONLY select from these somehow?) - then get the computer to pick as well (those random commands might come in handy) - then compare the two inputs and decide who wins and (as games usually run the best of 3) you will need to count each players score and decide which player has won. And once the game has completed you might want to ask your players if they want to play again? 

Finally - if that's all too easy for you I suggest creating an 'expansion' to your game that plays rock, paper, scissors, lizard, spock following this logic: