Showing posts with label Tkinter. Show all posts
Showing posts with label Tkinter. Show all posts
Friday, 25 July 2014
Tkinter - Random Backgrounds with Python, version 2!
Our original random background generator was rife with errors so we've restructured it to make it a little better. See if you can follow the math and where I went wrong in the last one!

Tuesday, 15 July 2014
Python - Level 3 Material
Level 3 Python Topics
- Review Python Level 1 Topics
- Review Python Level 2 Topics
- Tkinter (GUIs)
- Object Orientation (classes)
Tkinter
Tkinter is a python module for creating simple graphical user interfaces (windows and elements). Whilst I covered the basics of making a Tkinter canvas and drawing shapes here, I'll also mention how to add buttons and text fields etc. Here's something we might start off with:Now to add a button:
But this button doesn't do anything. To attach some functionality to it (in this case we're going to overwrite the blue rectangle with a white one) we use the 'command='statement in the Button() method and then we write a method linked to that (in our case called doClear).
But we can also add more than buttons - for instance here's a text_field with an associated label:
And here's a dropdown menu that allows users to pick from a series of predetermined choices:
Challenge:
Make a Tkinter GUI that allows the user to pick from a list of countries and then draws out their flags using the Tkinter canvas create_rectangle/arc/oval commands when the 'Draw' button is pushed. I suggest starting with Japan, Germany, Norway and Scotland.
Object Oriented Programming
Object orientation is a way of re-organising your code in such a way that it makes doing lots of complicated things much easier (a bit like we did with methods in the Level 2 section). The only way I managed to wrap my head around it (and it took me ages!) is to think of an illustrative example. Imagine you were writing a simple game like pong for instance.
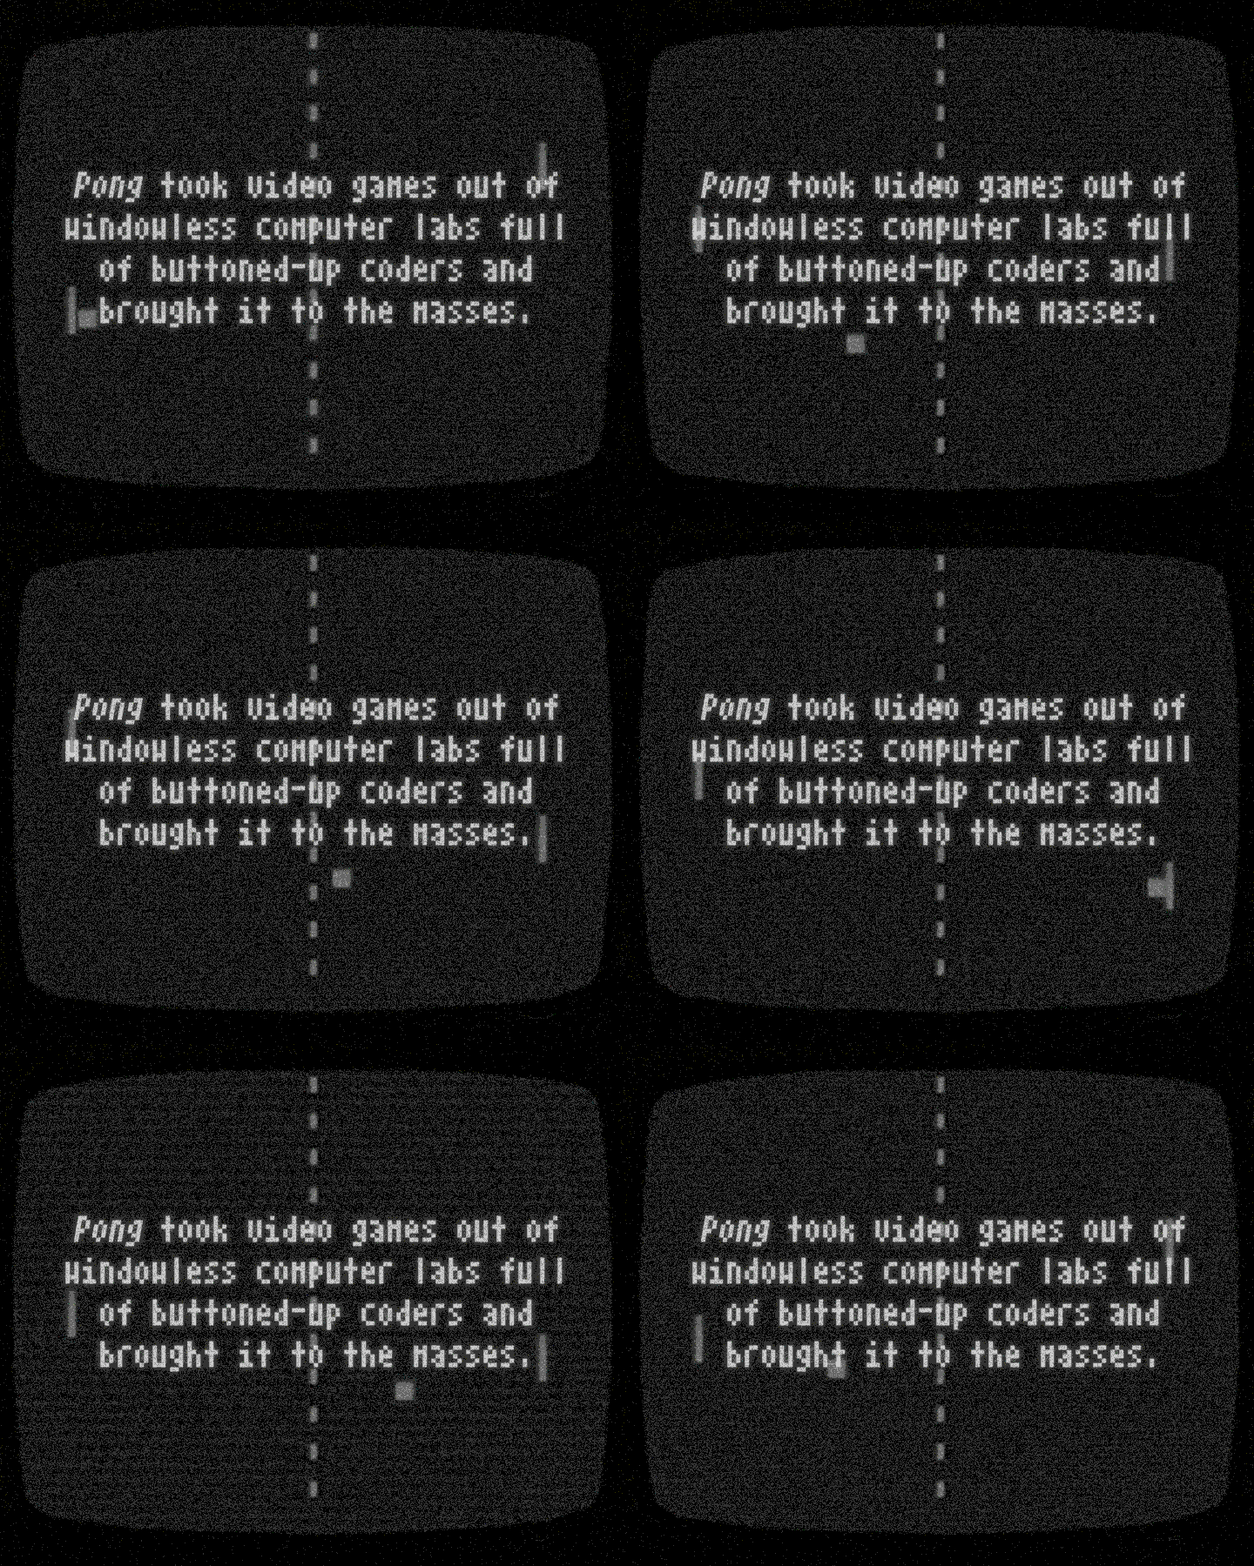
Essentially you need to create two paddles and a ball (ignoring scoring), remember where each is, what direction it's travelling in and at what speed, where its edges are etc. You can do this pretty easily with only 3 items (although it will require a fair few variables). But imagine what would happen if you tried to extend pong in any way; What if you decided to add 2 balls? Or 3? What if you just wanted to add in a third dimension? The number of variables and complexity gets huge! And we're just doing more of the same, so instead we write a Class for the ball and paddles and then we just say how many of each we want. Each class remembers its own set of variables, which means we only have to define each one once and every new copy already has its own variables. For instance the Ball class might be defined like this:
The full code of a ball class might look like this:
and now if we want to add bouncing functionality off the walls (and generally clean up the code)
Challenge:
First, extend the code above to have >100 balls all starting at different locations (this should only take about 5 more lines of code). Make Pong using Tkinter and a class for the GUI, paddles and ball(s).Final Challenge:
Build a 'mosaic maker' program - a program that generates a grid of squares in a GUI canvas and allows the user to change their colour by clicking on them (example shown below). The GUI should have 2 buttons that allow the user to select either red or blue for the colour of the clicked square (the default should be black) and one that allows the user to clear the grid to white. Finally you may want to extend your program to allow the user to replace a square with a .png image of their choice or to choose particular colours by entering their numeric RGB values, and write a doctest that tests your programs ability to deal with non-RGB inputs. Finally re-structure your program so that you have a class for the GUI.

Monday, 26 May 2014
Tkinter - Random Backgrounds with Python
Ever tried to design your own game? It can
be a tricky process though so I’ll walk you through it using an example.
You can either copy the example and modify it to make it more like what
you want or try something different. I would recommend following along
with these examples first though to see what you can expect.
We’re
going to start by creating a 2D game, with a randomly generated
background that you have to move your character through to get to the
exit. Once that’s done we will add some monsters to chase your character
and then the sky’s the limit! Diagrammatically it might look like this:
I’m
going to start by creating a randomly generated forest with some rocks
and trees (similar to what you might find in old school pokemon games).
First off go find some objects you want to randomly scatter around your
map. Remember they should be .gif images!
If you’re looking for some code to use an example try this (yes I used stones and trees because I’m a farm boy)
So
you now have a randomly generated background each time you run the
programme. The problem is that, well, it kinda sucks. It would be better
if we could stop trees and rocks from appearing in the same place
wouldn’t it? And if they didn’t disappear off the edge of the map?
Whoa!
That got really horrible really quickly didn’t it. If you poke through
the code above you might be able to understand what I was doing. I made a
list of all the locations I had placed each tree and just checked that
the distance between those locations and any new location was greater
than the width of the new image I was adding. Unfortunately it’s easy
for this sort of structure to get stuck in an infinite loop (as the
computer is just randomly guessing each time where to place things).
CHALLENGE #5!
Can
you imagine a better way to decide where to place our new trees? Is
there a maximum number of trees/rocks we can fit into our window? How
might we figure it out? (Hint: this becomes a lot easier if we re-visit this after we’ve learned object orientation)
CHALLENGE #6!
If
we were creating a real level we wouldn’t want things placed randomly.
Objects have rules. Imagine trying to create a river through our field.
The rule is that from a starting location the river can only be extended
into a location that’s next to a bit that’s already river. Can you
think about how we might some code to figure this out?
Tkinter - Python games with Tkinter
Note: I would only use Tkinter to create games if you have an issue installing external python libraries to your system or if you're using Python 3 rather than Python 2. Otherwise the specific game libraries pygame or pyglt are both superior and easier to learn. There are introductory tutorials to both of these in the sidebar.
Tkinter is a python library that comes standard with both Python 2 and Python 3 for generating Graphical user interfaces (GUIs). It's ubiquity is its strength more than anything else and I frequently resort to Tkinter when I can't get other libraries installed (a common problem for many Digital Technology classes here in NZ).
Open IDLE (if you don’t have it download and install it from here - you want the Python 3.4.0), select a ‘New File’ from the file menu. This is where we will write the majority of our code. the other window is called a ‘shell’ and allows you to interact with your program - but it will make things more complicated than they need to be so we’ll leave it alone for now.
If this is your first time programming - here are 4 things to know:
1) spelling and capitalization are crucially important. If your code doesn’t work check your spelling
2) in python, indentation is important. Code from this tut should be copied directly with indents preserved. If your code doesn’t work, check your indents are right.
3) Patience. You will make mistakes. Lots of them. They will irritate you. You will stop making them, but only through practice. If you’re getting irritated stop and try something else for a while!
4) Google it. Seriously. Any problem you have - google it and pick the result (look for a website called stack overflow) and chances are you will find a solution.
Then select ‘Run’ from the file menu above or push F5 on your keyboard (or fn and F5 on OSX). If you get an import error (i.e. your console says something like 'cannot find Tkinter module') try changing the import statement from import Tkinter (for Python 2.7) to import tkinter (Python3)
You made a window!
You’re doing several things:
creating a window:
Window = Tk()
filling the window with something you can draw on:
canvas = Canvas(height=500, width=500, bg='red')
canvas.pack()
creating a rectangle in that canvas:
canvas.create_rectangle(200,200,300,300, fill='blue', activefill='green') #x1,y1,x2,y2
(N.B. you can make lots of other shapes using: create_oval, create_arc, create_line etc)
then running our program:
Window.mainloop()
If you care about any of this (or want to know more!) - justask Elf google it.
Good news: you don’t need to understand it to use it!
Make a 400x 400 pixel window with a green background that has a smiley face on it.
Find an image from somewhere that is in .gif format (or find an online converter). Put it in the same directory as where your python file is saved and give it the name ‘image.gif’
Now try this code:
What do you need to change to move your image around your canvas?
OK now we’re going to do some more advanced programming. Why? Because we want lots of images in lots of places rather than just one. We’re going to use a loop to do that (specifically a for loop). Here’s your code:
Now to explain that ‘import’ statement up the top. When programming it’s common to use bits of code other people have made. These are called libraries and we’re already using one called Tkinter. Now we need to use another one called random which will allow us to generate random numbers (yes exactly like playing calculator cricket). Try this:
and now your images are randomly located all over the map :) Note that we’ve also slightly changed our for loop.
Make 20 ovals of random sizes and locations all over your canvas
So random placement is ok - but movement would be better. To start we’re going back to moving one image at a time in the interest of simplicity. We’re going to do this by DEFINING two VARIABLEs for the position of our image. Then we’re going to re-draw our image each time it moves and updates our canvas.
So moving things is ok - but when really want them to move forever, not just for a set period of time. For this we will need a new structure called a while loop.
Now we can add another kind of programming tool called an if statement (or a conditional statement). These allow us to specify different actions depending on what’s going on! Try this:
Whoa?! That’s a bunch of new code. All it’s doing is saying that whenever your object gets to the edges of our window we change it’s speed. See if you can follow through the logic (but again don’t worry if you can’t). To give you a clue - the x and y are position VARIABLES (they remember where on the screen our object is) and the dx and dy are how fast to move in either the left or right direction or the up and down direction respectively.
To really make this a game though we want you to be able to control aspect of your character with either the mouse or keyboard. We’re going to do this by making the up arrow on the keyboard make the object move faster and the down key do the opposite.
Try it out. What do you notice? Can you find the bug?
Once again - if this doesn't work and your error message say something about '<key>' in the .bind() command above change <key> to <Key> and it should work.
We’ve used a heap more code this time and something called a ‘method’. It’s quite a bit more complicated and so once again - if you don’t understand don’t worry! However, the bad news is that we’ve reached the limit of what we can do programming as we have been. To go further we’re going to have to think about our programs in a way called ‘Object Oriented Programming’. Think about it like this: in our example above we keep variables for the speed and position of our character. If we had multiple characters we would have to make all these again for all of them and the number would quickly become unmanageable (so would the code for that matter!) - so we need a new way of thinking about things. We will do this by creating objects and getting each object to remember its own speed and position.
From here you have a few choices - continue with the more complicated programming (which will be useful for any language or game you use in the future), move onto something else like unity or blender, or spend some time designing your game and use what you’ve learned above to make a randomly generated background.
Why Tkinter and what is it?
Tkinter is a python library that comes standard with both Python 2 and Python 3 for generating Graphical user interfaces (GUIs). It's ubiquity is its strength more than anything else and I frequently resort to Tkinter when I can't get other libraries installed (a common problem for many Digital Technology classes here in NZ).
Making windows and objects
Open IDLE (if you don’t have it download and install it from here - you want the Python 3.4.0), select a ‘New File’ from the file menu. This is where we will write the majority of our code. the other window is called a ‘shell’ and allows you to interact with your program - but it will make things more complicated than they need to be so we’ll leave it alone for now.
If this is your first time programming - here are 4 things to know:
1) spelling and capitalization are crucially important. If your code doesn’t work check your spelling
2) in python, indentation is important. Code from this tut should be copied directly with indents preserved. If your code doesn’t work, check your indents are right.
3) Patience. You will make mistakes. Lots of them. They will irritate you. You will stop making them, but only through practice. If you’re getting irritated stop and try something else for a while!
4) Google it. Seriously. Any problem you have - google it and pick the result (look for a website called stack overflow) and chances are you will find a solution.
Get started - make a window
Copy and paste the following code into the window:Then select ‘Run’ from the file menu above or push F5 on your keyboard (or fn and F5 on OSX). If you get an import error (i.e. your console says something like 'cannot find Tkinter module') try changing the import statement from import Tkinter (for Python 2.7) to import tkinter (Python3)
You made a window!
Filling the window
Try replacing your code with this instead, and hit Run. Time for a bit of explanation!You’re doing several things:
creating a window:
Window = Tk()
filling the window with something you can draw on:
canvas = Canvas(height=500, width=500, bg='red')
canvas.pack()
creating a rectangle in that canvas:
canvas.create_rectangle(200,200,300,300, fill='blue', activefill='green') #x1,y1,x2,y2
(N.B. you can make lots of other shapes using: create_oval, create_arc, create_line etc)
then running our program:
Window.mainloop()
If you care about any of this (or want to know more!) - just
Good news: you don’t need to understand it to use it!
CHALLENGE #1!
Make a 400x 400 pixel window with a green background that has a smiley face on it.
Adding images
Find an image from somewhere that is in .gif format (or find an online converter). Put it in the same directory as where your python file is saved and give it the name ‘image.gif’
Now try this code:
What do you need to change to move your image around your canvas?
Duplicates
OK now we’re going to do some more advanced programming. Why? Because we want lots of images in lots of places rather than just one. We’re going to use a loop to do that (specifically a for loop). Here’s your code:
Random
Now to explain that ‘import’ statement up the top. When programming it’s common to use bits of code other people have made. These are called libraries and we’re already using one called Tkinter. Now we need to use another one called random which will allow us to generate random numbers (yes exactly like playing calculator cricket). Try this:
and now your images are randomly located all over the map :) Note that we’ve also slightly changed our for loop.
CHALLENGE #2!
Make 20 ovals of random sizes and locations all over your canvas
Movement!
So random placement is ok - but movement would be better. To start we’re going back to moving one image at a time in the interest of simplicity. We’re going to do this by DEFINING two VARIABLEs for the position of our image. Then we’re going to re-draw our image each time it moves and updates our canvas.
Advanced movement
So moving things is ok - but when really want them to move forever, not just for a set period of time. For this we will need a new structure called a while loop.
Boundaries
Now we can add another kind of programming tool called an if statement (or a conditional statement). These allow us to specify different actions depending on what’s going on! Try this:
Whoa?! That’s a bunch of new code. All it’s doing is saying that whenever your object gets to the edges of our window we change it’s speed. See if you can follow through the logic (but again don’t worry if you can’t). To give you a clue - the x and y are position VARIABLES (they remember where on the screen our object is) and the dx and dy are how fast to move in either the left or right direction or the up and down direction respectively.
Keyboard control!
To really make this a game though we want you to be able to control aspect of your character with either the mouse or keyboard. We’re going to do this by making the up arrow on the keyboard make the object move faster and the down key do the opposite.
Try it out. What do you notice? Can you find the bug?
Once again - if this doesn't work and your error message say something about '<key>' in the .bind() command above change <key> to <Key> and it should work.
We’ve used a heap more code this time and something called a ‘method’. It’s quite a bit more complicated and so once again - if you don’t understand don’t worry! However, the bad news is that we’ve reached the limit of what we can do programming as we have been. To go further we’re going to have to think about our programs in a way called ‘Object Oriented Programming’. Think about it like this: in our example above we keep variables for the speed and position of our character. If we had multiple characters we would have to make all these again for all of them and the number would quickly become unmanageable (so would the code for that matter!) - so we need a new way of thinking about things. We will do this by creating objects and getting each object to remember its own speed and position.
From here you have a few choices - continue with the more complicated programming (which will be useful for any language or game you use in the future), move onto something else like unity or blender, or spend some time designing your game and use what you’ve learned above to make a randomly generated background.
Subscribe to:
Posts (Atom)